

Step-by-Step Guide to Effectively Clean Your Vacuum
Have you ever asked yourself why your vacuum smells stinky or does not pick up dirt as it did initially, yet it looks good on the outside? Your vacuum cleaner is one of the most active instruments in your dwelling as it picks up dust, pet hair, crumbs, and debris week in and week out. When was the last time you did it a nice deep clean? Vacuums are in need of cleaning too, and many people do not realise it. When your vacuum cleaner is not maintained well, it might not only reduce its suction quality but also produce allergens and even reduce its lifespan. The silver lining is, the good news is, that the program can be easily learned by students and enjoyed by them. It does not take long to deep clean your vacuum (and has become quite a satisfying experience).
Now, we will go through an all-inclusive step-by-step procedure which will enable your vacuum to operate as a brand new one.
1. The Importance of Deep Cleaning Your Vacuum
In the course of time, vacuums store dirt and grime in other places besides the dust bag or canister, as per bond cleaners in brisbane. Brush rolls, filters, and hoses can clog or become dirty, causing bad smells, low suction and low performance. Failure to care about it can result in damaging the motor and reducing the use of vacuum. Deep cleaning will rescue good airflow, enhance suction, and will make sure that your vacuum is working to the best of its abilities. It is also an excellent method through which it is possible to get rid of entrapped allergens, which can recirculate back into the house.
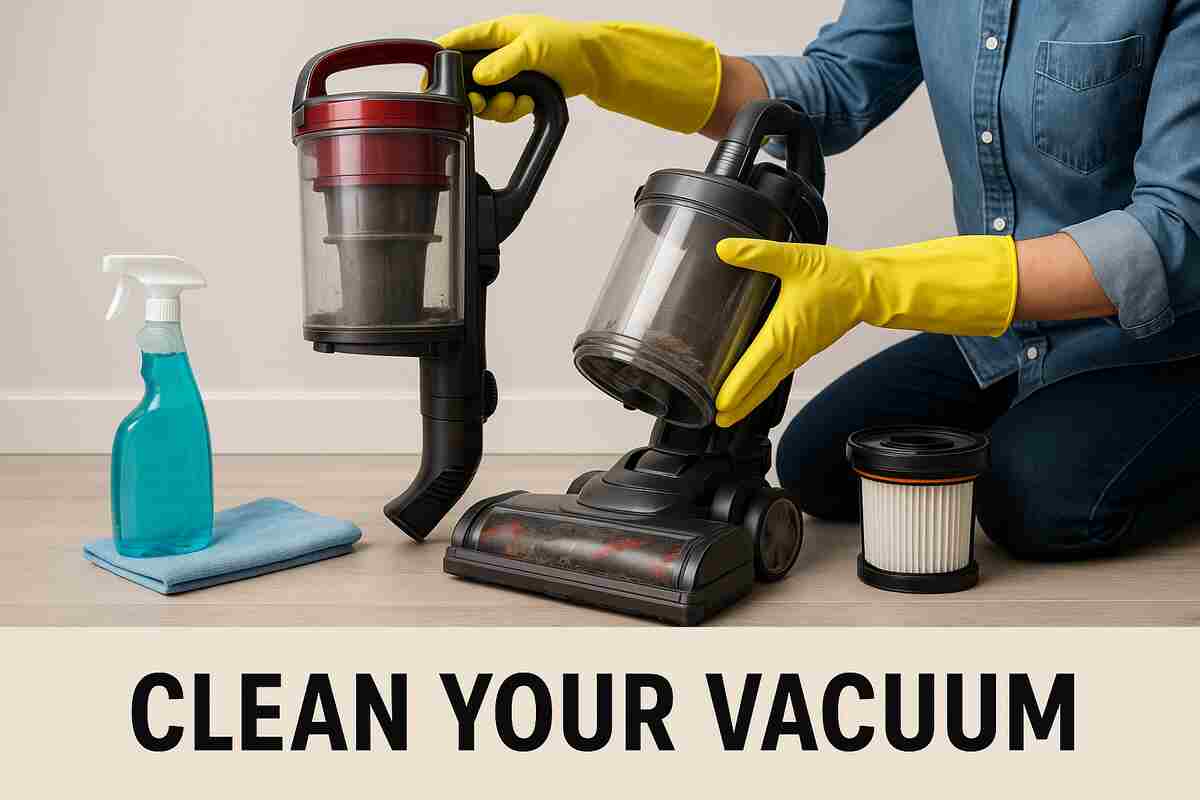
2. Get out your cleaning supplies
Take the necessary things before cleaning: warm water, mild soap, a small brush, scissors, microfiber cloths, and a screwdriver. A worn toothbrush is useful with the difficult areas and there is nothing like compressed air or a vacuum blower with crevices. The availability of everything accelerates the process and makes it more efficient.
3. Unplug and take apart the Vacuum
Safety will be the priority. Unplug the vacuum before you enter into the cleaning process. Take apart the pieces according to the model of your vacuum- in most cases this will involve taking out the dust canister or bag, filters, brush roll, the hose, and any attachments. Look at the user manual in case you do not understand how to dismantle it. Certain sections could be cut off or screwed on, so pay attention to the way everything comes apart simply by taking note of everything.
4. Clean out and Hollow the Dust Container or Bag
When using a vacuum cleaner you should empty the dust bag by removing it cautiously and disposing it of outside where it cannot cause air-borne dust in the house. In the case of canister models, pour out the contents in a garbage bag, and rinse the canister with warm soapy water. Brush or wipe off any imbedded stuff that has stuck to it. After it has been cleaned, rinse it well then leave it to dry. It may produce unpleasant odours or it may foster the growth of moulds when assembled back before it dries.
5. Clean or change the Filters
Dusts and allergens are caught in filters, and thus see whether yours is cleanable or dispose. Rinsable filters must be filled up with warm water and let it dry within 24 hours. Change the dirty non-washable ones. Emptying dustbags and cleaning or changing filters should be done once after every 1-3 months, which improves the quality of air and the performance of the vacuum cleaner.
6. Clean and Remove Hair on Brush Roll
The brush roll (or beater bar) tends to become snarled up with hair, strings and lint. Place the vacuum on its back and delicately cut with any scissors any debris that is invading the roller. After untangling set, wipe brush roll with a wet fabric, dust and residue. Your brush roll is removable on the ends, so disassemble and wash dirt and hair out of the caps where they frequently are deposited. The roller that is clean and does not have a tangle on it rotates more freely and does a much better job of picking up the debris.
7. Clean out the Hose
Vacuum hoses can easily get blocked and this is in the case that you have sucked up anything strong. You check to see whether it is clogged by looking through the hose pipe or by gently pushing a broom handle through the pipe. When it is evident, wash the interior with hot and soapy water. Shake the water out and give it a run thing and hang up the hose vertical so that it dries out. Dry the hose thoroughly and before reconnection; this would avoid mould or mildew.
8. The Outside and Fittings Clean Wipe
Clean the body of the vacuum well now. You need to use a wet microfiber cleaning cloth to clear the main body, wheels, handle, and control buttons. The attachments should not be left without cleaning. Brushes, crevice tools and extension wands may be cleaned by being rinsed in soapy water and left to dry. cleaning them ensures that you do not end up spreading the dust over again and keeps your vacuum looking new.
9. Put the Vacuum Back Together and Test it
After all the parts are dry and clean, carefully reassemble your vacuum. Filters, canisters, and rollers need to be properly fitted and fixed. Connect the vacuum for a small test. Immediately, you will be able to feel the difference in the suction, less noise, and no traces of musty odours. In case some of its parts are not functioning properly, inspect the assembly and make sure that everything is aligned.
Conclusion
It is time to repay your vacuum cleaner, which, just like you, does the dirty work, but literally. A clean vacuum would be more effective, durable and create a healthier place in your home. Not to mention that it is more convenient and satisfying to deep clean than you would imagine. That is why, the next time your vacuum stops performing well, or when it has an unpleasant odour, do not ever take it to the shop or buy a new one, give it a thorough clean instead. For professional assistance, check out expert cleaning services and ensure your property looks spotless.